How to Make Rice in a Rice Cooker

By ShowMeStepByStepPublished Updated

Based on a video by Tu Ngo.

Rice cookers solve the one thing that goes wrong with rice on the stovetop: forgetting about it. The cooker handles temperature, timing, and shutoff. You measure the rice, add the water, press a button, and walk away. Twenty-five minutes later you have fluffy, separate grains, every time.

The whole method comes down to a few decisions. Use the cup that came with the rice cooker for measuring (it's smaller than a US measuring cup, and the bowl's water-line marks are calibrated to it). Use a 1:1 ratio for short-grain white rice, 1:1.5 for long-grain, 1:2 for brown rice. Press the matching button (white, brown, or quick) and let the cooker run.

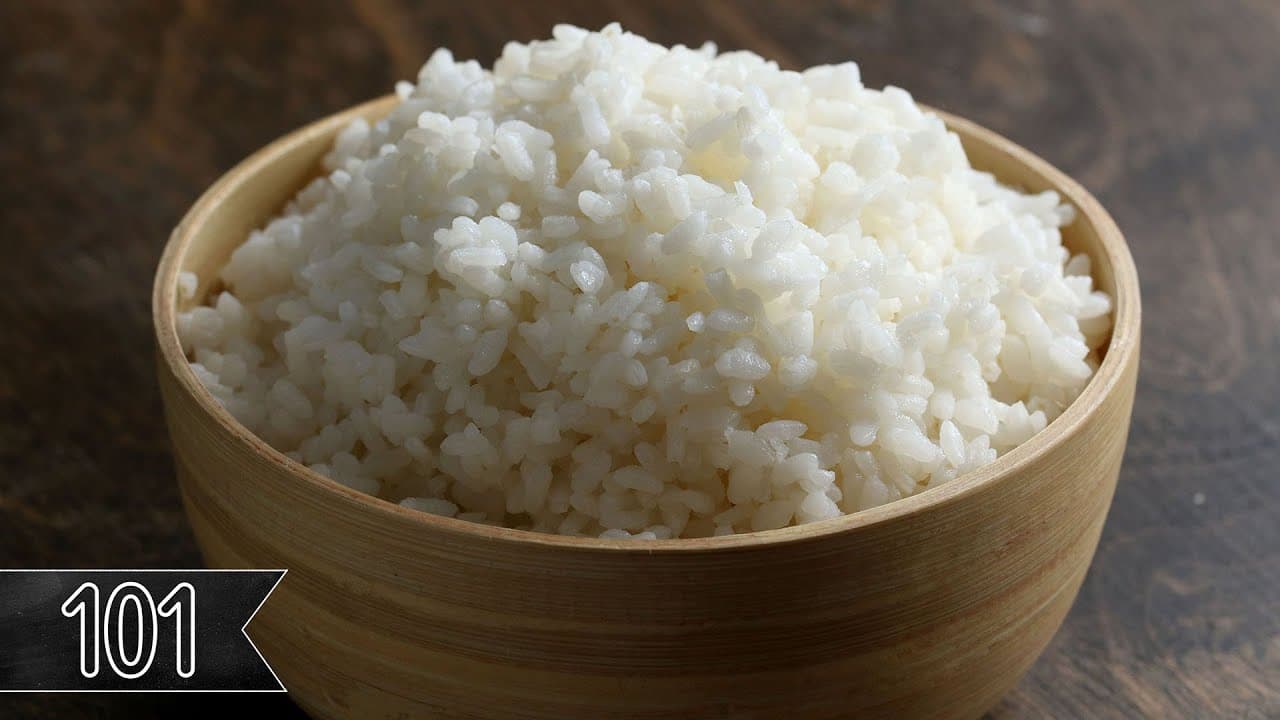
Tu Ngo walks through the basic version with short-grain white rice and a 1:1 ratio. The full process from measurement to fluffing takes about 30 to 35 minutes for a standard 3-cup batch. Brown rice needs 45 to 60 minutes. Once you understand the ratios, the rice cooker handles everything else.

Variations by rice type

Short-grain white rice (sushi rice, Japanese rice, Calrose). Use a 1:1 ratio of rice to water (one cooker cup of rice to one cooker cup of water). Cooks in about 25 minutes on the white-rice setting. The grains stick slightly together when done, which is what you want for sushi or bowls.

For finished sushi rice, mix 2 tablespoons rice vinegar + 1 tablespoon sugar + 1 teaspoon salt into 2 cooker cups of just-cooked rice while it's still hot. Fold gently with a wooden paddle until the rice cools to room temperature. This is what makes homemade sushi rolls taste like the restaurant version.

Long-grain white rice (jasmine, basmati). Use 1:1.25 to 1:1.5 rice to water. Jasmine takes 1:1.25 (it's a softer grain); basmati takes 1:1.5 (the grains stay firmer and longer). Same white-rice button as short-grain. Don't rinse basmati unless you're going for the fully-separated, fluffy look; rinsing removes some of the starch that helps the grains hold together.

Brown rice. Use a 1:2 ratio and the brown-rice setting if your cooker has one. Brown rice takes 45 to 60 minutes because the bran layer slows water absorption. Without a dedicated brown setting, soak the rice for 30 minutes first, then use the white-rice setting and add 5-10 minutes at the end on warm.

Wild rice or rice blends. Use the ratio printed on the bag (typically 1:2.5 to 1:3 for pure wild rice; 1:2 for blends). Wild rice has tough hulls that need longer cooking. Most rice cookers don't have a wild-rice setting, so use the brown-rice setting and add 5-10 minutes if the grains haven't split open.

Adding flavor (broth, salt, oil). Substitute chicken or vegetable broth for the water 1:1. Add up to 1/2 teaspoon of salt per cup of rice and 1 teaspoon of oil if you want individually-coated grains. Skip butter; it foams over and clogs the cooker's steam vent.

Common questions about rice cookers

Six questions we get most often about ratios, rinsing, and what to do when the cooker doesn't give you the rice you wanted.

How much water do I add for 2 cups of rice in a rice cooker?

Depends on the rice type. For short-grain white: 2 cups water. For long-grain white (jasmine, basmati): 2.5 to 3 cups water. For brown rice: 4 cups water. Always use the cup that came with the rice cooker, not a US measuring cup. The cooker cup is about 3/4 the size of a standard 8-oz measure, and the bowl's water-line marks are calibrated to it.

Should I rinse the rice first?

For most white rice, yes. Rinsing removes surface starch that makes the cooked grains stick together and turn gummy. Run cold water over the rice in the bowl for 30 seconds, swish with your hand, drain, repeat 2-3 times until the water mostly clears. Skip rinsing for basmati if you want the grains to hold together (some of the surface starch is what gives basmati its texture), and never rinse parboiled or converted rice (the starch coating is the point).

Why is my rice gummy or mushy in the rice cooker?

Usually too much water, less commonly the wrong rice setting. Drop the water by 1/4 cup next time and recheck. If the rice is mushy on top but firm on the bottom, the bowl wasn't level when the cooker ran, or the rice wasn't spread evenly before starting. Level the rice with the back of a spoon before closing the lid.

Why does my rice stick to the bottom of the rice cooker?

That bottom crust is normal and is actually prized in some cuisines (called nurungji in Korean or okoge in Japanese). To prevent it, switch the cooker to keep-warm immediately when it beeps - the longer it sits on warm with the rice undisturbed, the more crust forms. Fluff the rice within 5 minutes of the beep to redistribute moisture and prevent sticking.

How long does rice take in a rice cooker?

White rice: 25 to 35 minutes from start to keep-warm. Brown rice: 45 to 60 minutes. Quick-cook setting (white rice only on most models): 18 to 22 minutes - useful but the grains are slightly less fluffy. Most cookers also need 5 to 10 additional minutes on keep-warm with the lid closed before fluffing for the best texture.

Can I cook other grains in a rice cooker?

Yes, with adjustments. Quinoa: 1:2 quinoa to water, white-rice setting, about 20 minutes. Oats: 1:2 oats to water for steel-cut (1:1 for rolled), brown-rice setting if you have one. Couscous: pour boiling water over couscous 1:1, close the lid, no heat needed - the cooker is just being a covered bowl in that case. Don't try to cook lentils or beans - they expand more than rice and can overflow the bowl.

Step-by-Step Guide

1

Step 1: Measure your rice

0:25
Step 1: Step 1: Measure your rice

Measure your rice into the rice cooker bowl. Use the cup that came with the rice cooker - typically 180 ml, smaller than a US measuring cup. Most cookers have water-line marks on the inside calibrated to that exact cup, so it's worth using.

For a single batch, 1 to 2 cups of dry rice is plenty. The rice will roughly triple in volume after cooking.

2

Step 2: Rinse the rice (optional)

0:50
Step 2: Step 2: Rinse the rice (optional)

Rinse the rice if you want fluffier, less-sticky grains. Swirl the rice in the bowl with cold water, drain, and repeat 2 to 3 times until the water runs mostly clear.

Skip this step if you want stickier rice for sushi or rice balls. Most American long-grain white rice is pre-rinsed and doesn't need it; jasmine and basmati benefit from a quick rinse.

Tip

If your rice cooker bowl has a non-stick coating, transfer the rice to a sieve to rinse rather than rinsing directly in the bowl. Avoid abrading the coating with the rice grains.

3

Step 3: Add water in a 1:1 ratio

2:15
Step 3: Step 3: Add water in a 1:1 ratio

Add water in a 1:1 ratio - one cup of water for every cup of rice. This is the standard short-grain ratio. For long-grain white rice use 1:1.5, and for brown rice use 1:2.

Most rice cookers also have water-line marks on the inside of the bowl that match these ratios. Find the line for the cup count you're cooking and fill water to that line.

Tip

For more flavor, swap the water for chicken or beef broth, or add a teaspoon of butter and a pinch of salt. The rice will absorb it as it cooks.

4

Step 4: Level the rice in the bowl

2:58
Step 4: Step 4: Level the rice in the bowl

Level the rice by gently shaking the bowl side to side. This ensures the rice cooks evenly - rice piled higher under one side will overcook while the rest stays raw.

Wipe the outside of the bowl dry before placing it back in the cooker. Water on the outside can damage the heating element over time.

5

Step 5: Close the lid and plug in

3:20
Step 5: Step 5: Close the lid and plug in

Close the lid until it clicks and plug the rice cooker in. Don't open the lid during cooking - the steam pressure inside is what cooks the rice evenly.

If your cooker has a vent hole on the top, leave it open so steam can escape. Some cookers boil over on the first batch if the vent is blocked.

6

Step 6: Select rice type and start

3:35
Step 6: Step 6: Select rice type and start

Press the power button, then select the rice type - white rice, brown rice, or quick rice. The cooker manages temperature and timing automatically based on what you pick.

White rice typically takes 25 to 35 minutes. Brown rice needs 45 to 60 minutes. Quick rice (for parboiled or instant) is closer to 12 minutes.

7

Step 7: Wait for keep-warm mode

4:15
Step 7: Step 7: Wait for keep-warm mode

Wait until the cooker switches to keep-warm mode (it beeps or the indicator light changes). Don't open the lid right away - let the rice rest for 5 to 10 more minutes on keep-warm so the steam redistributes.

This rest period is what gives you fluffy, separate grains rather than a sticky clump. Skipping it gives you wet rice on top and dry rice on the bottom.

8

Step 8: Fluff and serve

4:30
Step 8: Step 8: Fluff and serve

Open the lid and fluff the rice with a paddle or fork. The grains should separate easily.

If you're keeping the cooker on warm for a while before serving, gently stir the rice every 30 minutes so the bottom layer doesn't dry out. Most cookers will keep rice warm safely for up to 12 hours.

Tip

Leftover rice keeps in the fridge for 4 to 5 days. Reheat in the microwave with a splash of water and a damp paper towel over the top to re-steam it.

Products used in this step

Products Used

❖ The Recipe

How to Make Rice in a Rice Cooker

Serves
Makes 3 cups cooked rice
Prep
5 min
Cook
30 min
Total
35 min

Ingredients

2 items
  • 1 cupwhite riceshort-grain or long-grain
  • 1 cupwateruse 1.5 cups for long-grain

Nutrition

estimated · per servingEstimated from the ingredient list, not measured. Actual values vary by brand, preparation, and serving size. Not a substitute for measured nutrition data.
Calories
103kcal
Protein
2g
Fat
0g
Carbs
22g
Sodium
0mg

Method

  1. 1
    Step 1: Measure your rice. Measure your rice into the rice cooker bowl.
  2. 2
    Step 2: Rinse the rice (optional). Rinse the rice if you want fluffier, less-sticky grains.
  3. 3
    Step 3: Add water in a 1:1 ratio. Add water in a 1:1 ratio - one cup of water for every cup of rice.
  4. 4
    Step 4: Level the rice in the bowl. Level the rice by gently shaking the bowl side to side.
  5. 5
    Step 5: Close the lid and plug in. Close the lid until it clicks and plug the rice cooker in.
  6. 6
    Step 6: Select rice type and start. Press the power button, then select the rice type - white rice, brown rice, or quick rice.
  7. 7
    Step 7: Wait for keep-warm mode. Wait until the cooker switches to keep-warm mode (it beeps or the indicator light changes).
  8. 8
    Step 8: Fluff and serve. Open the lid and fluff the rice with a paddle or fork.

Your Guide

Tu Ngo

As an Amazon Associate we earn from qualifying purchases. Links on this page may be affiliate links - clicking them and buying doesn't change your price, but helps support ShowMeStepByStep.

Tags

Test your knowledge

Did the lesson stick? Find out in 2 minutes.

5 quick questions covering what you just read. No signup, no score saved — just a gut check.

Quick reference

Key takeaways from How to Make Rice in a Rice Cooker

5 questions, answers, and one-line explanations. Tap to expand.

  1. 1.Which measuring cup to use?

    Answer: Cup that came with cooker

    Usually 180 ml - smaller than US cup. The bowl's water-line marks are calibrated to it.

  2. 2.Ratio for short-grain rice?

    Answer: 1:1 standard

    1:1 short-grain, 1:1.5 long-grain white, 1:2 brown. Bowl water lines often match these ratios too.

  3. 3.Why level the rice in the bowl before closing?

    Answer: Cooks evenly all parts

    Rice piled higher on one side overcooks while the rest stays raw. Gentle side-to-side shake levels it.

  4. 4.Don't open the lid mid-cook. Why?

    Answer: Steam pressure cooks

    Steam pressure inside is what cooks the rice evenly. Opening drops pressure and cook goes uneven.

  5. 5.What gives you fluffy separate grains?

    Answer: Rest 5-10 min after

    When cooker switches to keep-warm, rest 5-10 min before opening so steam redistributes. Skip = wet top, dry bottom.

What's next

Related collections

Curated theme pages that include this tutorial.

Weekly Digest

Liked this cooking tutorial?

Pick the categories you want to hear about. Weekly digest of new step-by-step tutorials. No spam, easy unsubscribe.

Send me tutorials about

We only email about new tutorials. Easy unsubscribe anytime.